7.3. WordPress Save Post
In the previous two blogs, we saw how to add custom post type and customize post editor. In this blog, we cover the steps to save the custom post and its meta data.

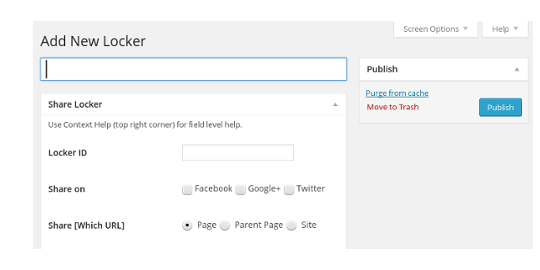
We added sos custom post type as use it as social lockers. Sos Lockers defines four meta data fields. One of benefits of WordPress Custom Post Type is that we can use WordPress Post management framework to handle activities such as publish, trash and edit. For example, to save or publish a social locker, we use the WordPress Post Publish button. This reduces large amount of code as the task of saving the Post (Social Locker) and its content is delegated to WordPress posts module.
WordPress Save Post and Meta Data
Though WordPress Post management framework takes care of publishing the custom post, the meta data management is still left to the plugin developer.
To do that, WordPress provides save_post action hook. After saving
the post, WordPress executes action methods attached to the hook. In
Sos::setup() method, we add Sos::save_post() method as the action to
the save_post hook.
share-on-social/admin/class-sos.php
    public function setup () {

        ....

        add_action( 'save_post', array($this,'save_post'));

        ....
    }

    function save_post ( $post_id ) {
        if ( defined( 'DOING_AUTOSAVE' ) && DOING_AUTOSAVE )
            return;

        if ( ! isset( $_POST[ 'locker_nonce' ] ) ||
                 ! wp_verify_nonce( $_POST[ 'locker_nonce' ], 'save_locker' ) )
            return;

        if ( ! current_user_can( 'edit_posts' ) )
            return;

        ....

        $id = 'share_target';
        $data = $this->sanitized_text( $id );
        update_post_meta( $post_id, $id, $data );

        .....
     }
In the save_post() method, we return without doing anything if
WordPress is auto saving the post or current user doesn’t have
edit_posts capability. We also check whether locker_nonce is
set for save_locker. This nonce ensures two things, firstly
save_post() method is executes only for sos custom post type as for
other post types this nonce is not set and secondly it secures the
publish request.
After passing these three conditions, we start to save meta data fields with WordPress function update_post_meta(). To the function, we pass the data returned by helper method - sanitized_text().
share-on-social/admin/class-sos.php
    function sanitized_text ( $id ) {
        $data = '';
        if ( isset( $_POST[ $id ] ) ) {
            $data = $_POST[ $id ];
        }
        return sanitize_text_field( $data );
    }
In the helper method, we obtain the data from $_POST if it is set and then sanitize it using WordPress function sanitize_text_field().
Similarly, we handle other meta data field such as locker id, share on and locker text.
Duplicate ID
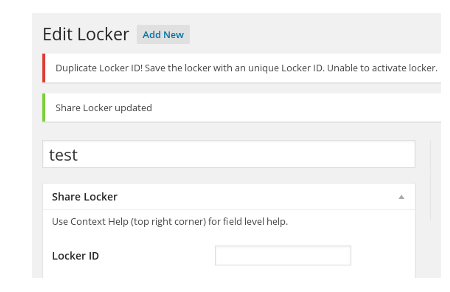
By using WordPress Post management framework, we avoid lots of code to save the locker. But there is a glitch. When we add multiple lockers with same id, WordPress happily saves them as it is not equipped to distinguish the duplicate posts. Lockers have to enforce unique constraint so that no two lockers can have same id.
In WordPress, there is no way to intercept and stop WordPress from publishing the post. Best we can do is, after the post publish check whether locker id is duplicate and if so, save an empty id and output duplicate id message to the user.
share-on-social/admin/class-sos.php
    function save_post ( $post_id ) {

        ....

        $id = 'locker_id';
        $data = $this->sanitized_text( $id );
        if ( '' == $data ) {
            set_transient( 'sos_invalid_id', true, 180 );
            update_post_meta( $post_id, $id, $data );
        } else {
            if ( $this->is_duplicate_locker( $post_id ) ) {
                $data = '';
                update_post_meta( $post_id, $id, $data );
                set_transient( 'sos_duplicate_id', true, 180 );
            } else {
                update_post_meta( $post_id, $id, $data );
            }
        }

        ....
     }
In the save_post() method, we check whether locker id is duplicate and if so, we set id to an empty string and then set a flag - sos_duplicate_id - as a transient option.
WordPress Transient Options are similar to WordPress Options, but they expire after certain interval. We use WordPress function set_transient() to set the flag for 180 seconds and after which it is deleted from database.
To display the duplicate id message we require another action hook admin_notices. This hook is used to display messages and notices at the top of the editor.
share-on-social/admin/class-sos.php
    public function setup () {
        add_action( 'admin_notices',
                array($this,'sos_admin_notice') );
    }

    function sos_admin_notice () {
        $duplicate_id = get_transient( 'sos_duplicate_id' );
        delete_transient( 'sos_duplicate_id' );
        if ( $duplicate_id ) {
            $message1 = __(
                    'Duplicate Locker ID! Save the locker with an unique Locker ID.',
                    'sos-domain' );
        }

        $html = '';
        if ( $duplicate_id) {
            $html = <<<EOD
   <div class="error"><p>{$message1} {$message2}</p></div>
EOD;
        }
        echo $html;
    }

Why are we doing this? The action method save_post() executes between submission of publish form and display of the request. We can’t pass the duplicate id message from save_post() method to the request output through $_POST or other mechanism. Workaround is to set a flag as a temporary option and echo the message to request output.
Posts, before save, pass through wp_insert_post_data filter and it looks promising for duplicate id issue. So far, we have not tried it out and may do so in future.
Change Post Updated Message
To change post save and update messages for custom post type, use filter hook post_updated_messages.
share-on-social/admin/class-sos.php
    public function setup () {
        add_filter( 'post_updated_messages',
                array($this,'filter_published_message' ) );

        ....
}


    function filter_published_message ( $messages ) {
        global $post;
        if ( false == isset( $post ) ) {
            return $messages;
        }
        if ( $post->post_type != $this->post_type ) {
            return $messages;
        }
        $index = 1;
        $message = __( 'Share Locker updated', 'sos-domain' );
        $messages[ 'post' ][ $index ] = $message;

        $index = 6;
        $message = __( 'Share Locker saved', 'sos-domain' );
        $messages[ 'post' ][ $index ] = $message;

        return $messages;
    }
WordPress passes array of messages as parameter to the callback function. If post type is sos, we change messages at index 1 and 6 which corresponds to update and save respectively and return the modified array back to the WordPress. For other post types, return the unmodified array.
In the tutorial, so far, we saw how to manage settings and custom lockers. With those admin modules in place we are ready to explore the plugins’ frontend. In the next chapter, we go through some of the important features that are essential for the frontend.